Guides / Bleed & Trimming
Tutorial for bleed and trimming.
The main delay we have when modifying files before making a proof is the bleed and bleed marks. This page explains why the bleed area matters and how to prepare it.
Why bleed is needed
When binding the pages together, they need to be trimmed so that they are all exactly the same in size.
This prevents the magazine/catalog from having an uneven edge that looks unprofessional and messy.
In order to trim the pages without cutting any page elements off, the pages should have a bleed area.
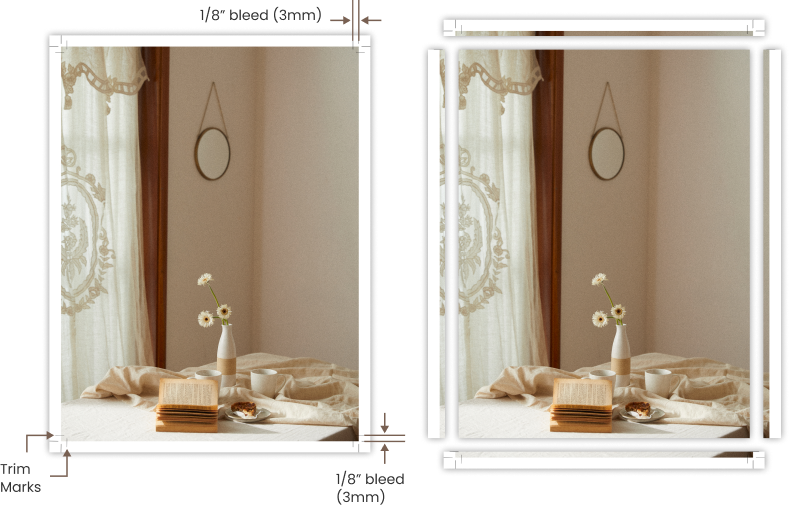
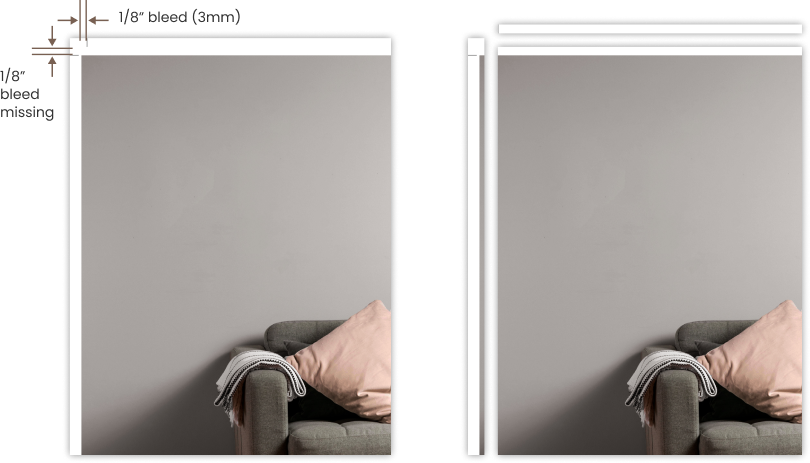
A bleed is a margin around all four sides of the page; a safe zone for trimming.
Without a bleed, if the page is exactly the dimensions needed, for example 8.5x11", trimming cannot be done properly and the pages may end up uneven.
How to create bleed
To create a bleed, extend the size of the layout.
The margin that appears around your art file should be equal on all four sides. We suggest a 1/8"(3mm) bleed for most projects.
Then, extend your art file into the bleed area a bit.
That way, if the trimming is done too close to the margin, no white lines will show up and the print will be to the edge of the page.
It is very important that you extend the page elements beyond its finished size so that we can avoid unsightly margins that may show up after trimming.
Bleed marks are placed in all four corners, unrasterized with the art file, to show where the trimming guideline should be.
If the bleed marks are a part of the file, they will show up after printing and could possibly be seen after trimming. This is why we ask that you send it unrasterized.
