Crop marks
Crop marks show the trim area so production can cut the pages correctly.
Guides / Print-ready PDF files
We've prepared layout samples and PDF export instructions for you to refer to while creating your art files.
Layout samples
Note the page layout, the bleed and bleed marks, and the page numbering.
Press quality
When you plan to work with a printing services company, it is important to provide a print-ready file. That way you avoid issues with the artwork, potential errors, or a result other than what is expected.
Crop marks show the trim area so production can cut the pages correctly.
Fonts should be embedded or outlined so the type does not change when the file is opened.
Use Spot or CMYK color, depending on the print method.
The PDF should match the required finished size and layout specifications.
Images should be prepared at 300 dpi for press-quality output.
Add 3mm(1/8 inch) beyond the borders so trimming does not leave unwanted white edges.

When you plan to work with a printing services company, it is important to provide a print-ready file.
A PDF is the preferred format because the factors of your file, including important settings, can be kept while the printer has flexibility in modification.

You can make a PDF by printing to a PDF driver, saving a file as a PDF, or exporting the file as a PDF.
How to convert
1. Choose File > Export.
2. Specify a name and location for the file.
3. For "Save As Type" (Windows) or "Format" (Mac OS), choose "Adobe PDF", and then click Save.
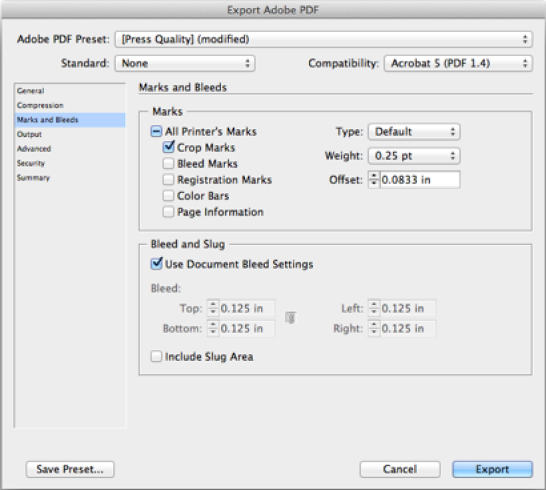
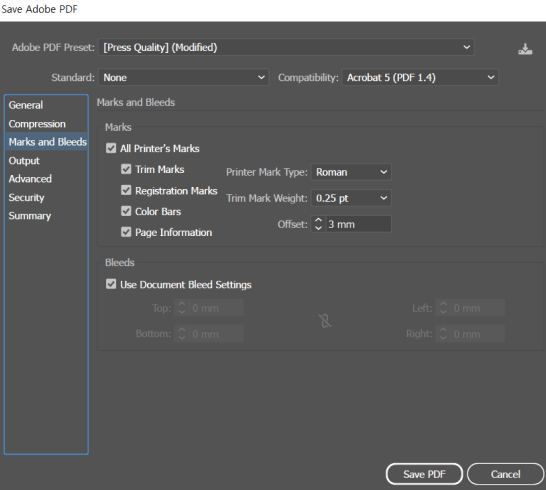
4. Choose Adobe PDF Preset "Press Quality".
5. Under "Marks and Bleeds" select crop marks and bleed (3mm or .125").
6. Click Export (Windows) or Save (Mac OS).
1. Choose File > Export.
2. Specify a name and location for the file.
3. For "Save As Type" (Windows) or "Format" (Mac OS), choose "Adobe PDF", and then click Save.
4. Choose Adobe PDF Preset "Press Quality".
5. Under "Marks and Bleeds" select crop marks and bleed (3mm or .125").
6. Click Export (Windows) or Save (Mac OS).
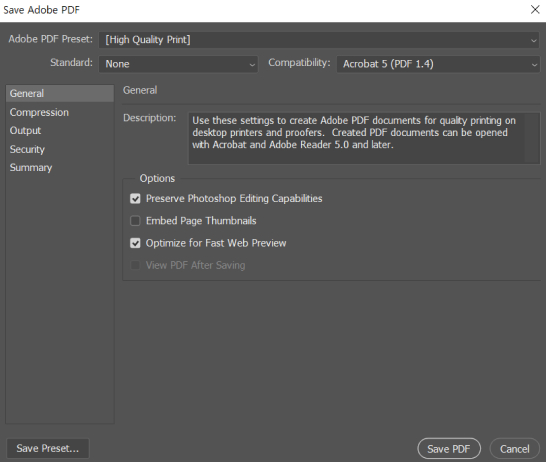
1. Choose File > Save As, and then choose Photoshop PDF from the Format menu.
2. Click Save. In the Save Adobe PDF dialog box, choose an Adobe PDF preset specifying whether the Photoshop file will be printed on a desktop printer or proofer, sent to a commercial printer, distributed by email, displayed on the web, and so on.
3. Choose Adobe PDF Preset "Press Quality".
4. Click Export (Windows) or Save (Mac OS).
